Repair Mackie CR4 speaker select switch
I wrote this 5 years ago. Since then, I’ve received several messages from people who were able to repair their speakers, which is really cool!
I’ve also gotten questions about other models of Mackie speakers and different failure modes on the CR4. I can’t answer those. I’m not a audio equipment repair specialist 🙂. I just fixed this one particular model well enough to enjoy it for a few more years.
Back in January 2016 I got a pair of Mackie CR4 speakers. They did the job by filling my apartment with music.
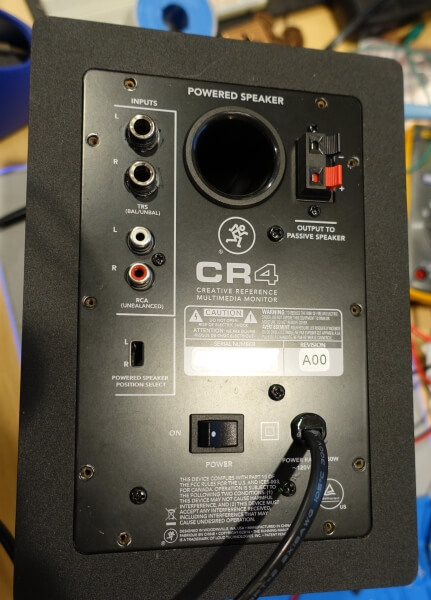
These speakers have a convenience feature in the form of a “powered speaker position select” switch. This switch flips audio left/right output so you can put the powered speaker (with volume knob and headphone jack) on whichever side you prefer without flipping the stereo input cable around. Problem is, the switch1 tends to fail (per Amazon reviews) after a few years.
Mine completely failed around October 2019. Mackie support informed me that they were out of warranty and I’d have to take them to a service center, which seemed like a lot of work. I thought about buying new speakers but decided to try to fix them instead.
Before I started I searched for how other people were fixing this and found forum posts talking about cutting lines to an IC (among other approaches). This struck me as the wrong approach to bypass a broken switch.
I tried to follow along with one Amazon review that mentioned soldering in jumpers, but it also mentioned cutting a trace and the jumper position didn’t make sense (perhaps because of camera angle).
Repair
Gain access to the board
 Unplug all the cords. You could leave the audio cords connected, but you really want to unplug the power cord for safety.
Remove the nine screws around the edge of the backplate. You should be able to lift the plate out once these are removed. Be careful as there are cables connected inside.
 You may need to disconnect the two white headers to get enough room to work.
Remove switch
 Unsolder the switch. I used a Hakko FX-888D soldering station and silicone-tipped solder sucker.
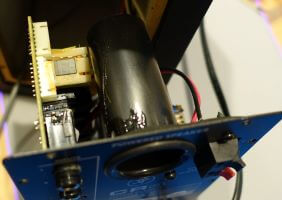
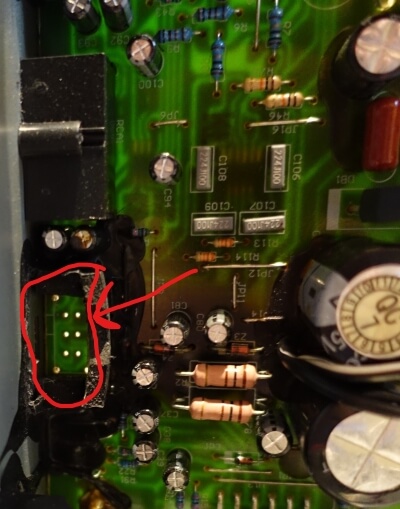 Unbolt the transformer once the solder is removed. You don’t need to disconnect it, just move it enough to access the switch underneath it.
The switch is inside a foam box. I trimmed it back with cutters so I could reach the switch housing with my multitool and wiggle it loose.
Add Jumpers
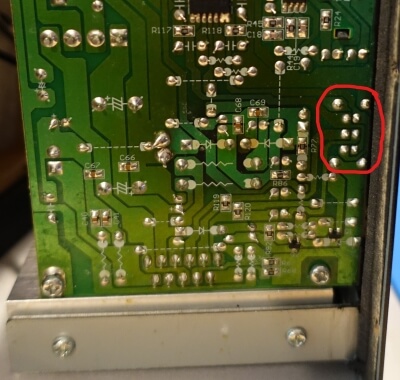
Time to add jumpers! This is the part where you decide if you want the powered speaker to always be on the left or right side of your desk.
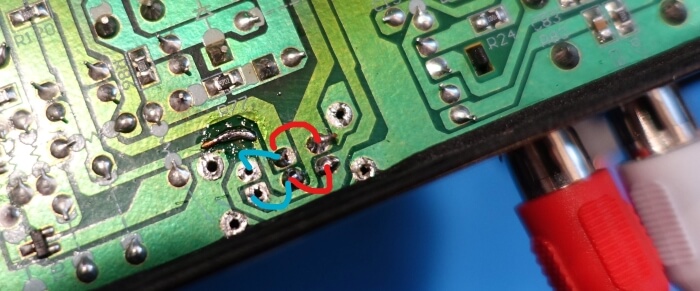
Add jumpers where the red lines indicate for left-powered, blue for right-powered (you must choose. do not connect red and blue).
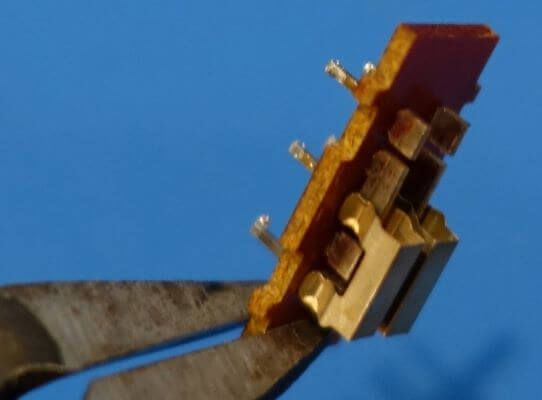
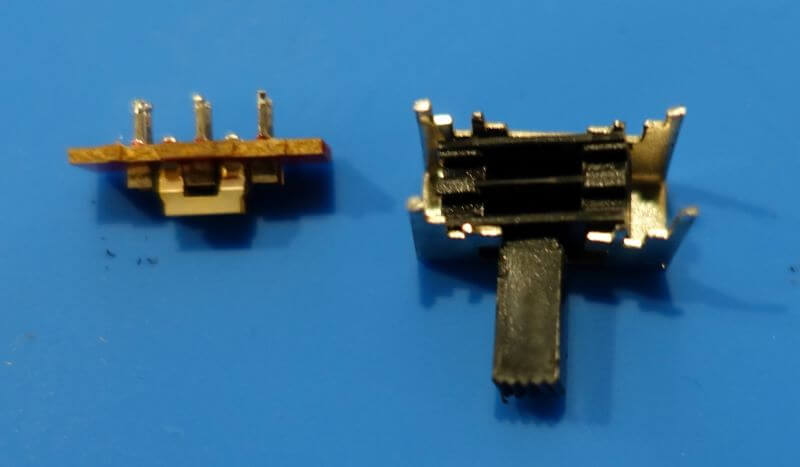
The problematic switch is DPDT consisting of two metal clips that slide over blades on a circuit board.
 ↩︎
↩︎